Before a visitor reads a word of text on your blog post, they focus on and skim the visual elements of the post. No matter how interesting or useful the actual content may be, if your page doesn't grab attention or if it has a sloppy design or lacks decent images and graphics, nobody will read your stuff. Luckily, making excellent, visually striking header image is easier than ever. We like Canva, a free online design tool. In minutes, you can make a beautiful and professional header graphic that will grab readers’ attention and drawn them into the actual content of your post. Here is a handy guide to spicing up blog posts with a splendid header title image using Canva.
Here's how to make your own header image like the one above.
Step 1: Get Started with Canva
Before you can actually do anything on the Canva site, you will need to set up your own account by clicking “Sign Up” and filling out the information as necessary. https://www.canva.com/
New (updated 11/26/19): Canva offers a "banner marker" option now. Check it out: https://www.canva.com/create/banners/
Step 2: Choose a Design Template
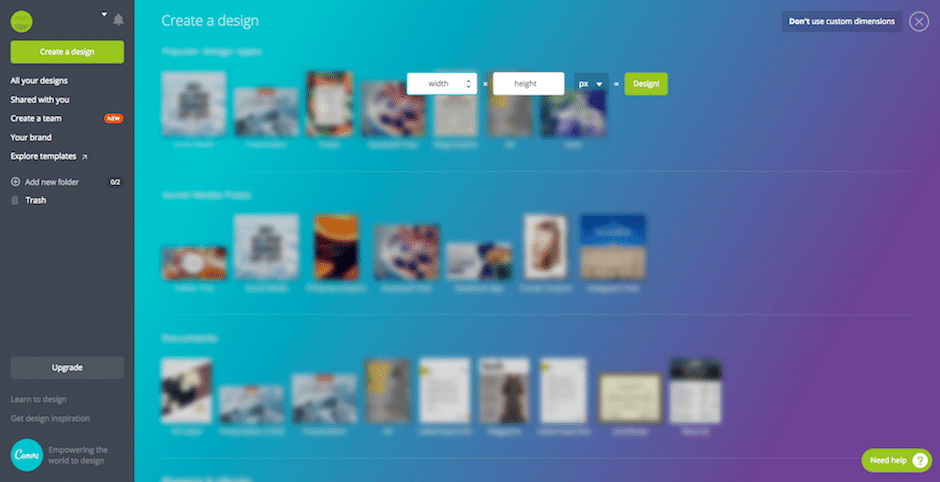
Once you’ve created a Canva account, choose which type of design you’d like to make. Scroll down to the blogging and eBooks section and select “Blog Title.” OR click the “use custom dimensions” button.
Tip: for Odysys users > select “use custom dimensions” and set yours to 800x450 - see below
Step 3: Select a Layout
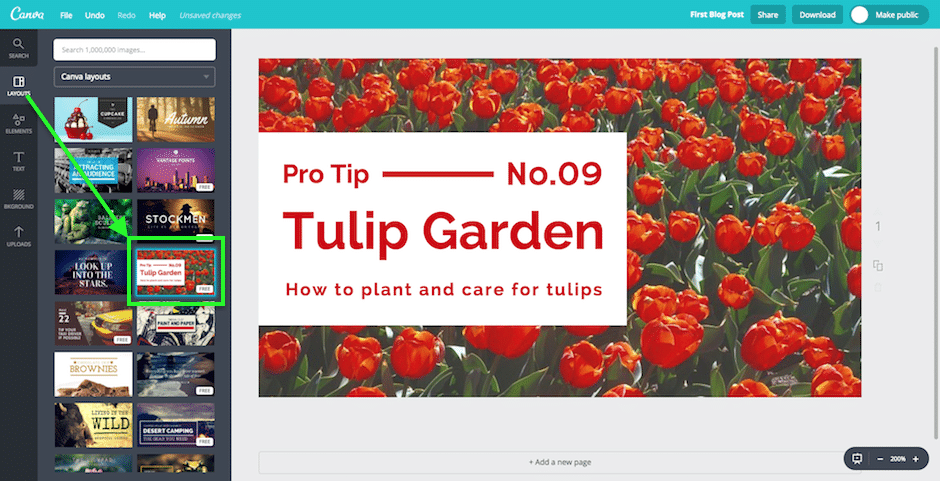
Next, you can choose from Canva’s selection of excellent pre-made layouts. Explore their options to see which one works best for you. If nothing strikes your fancy, you can also design your own from scratch.
Tip: Some layouts cost money. Look for the “Free” label on the layout
Step 4: Start Designing
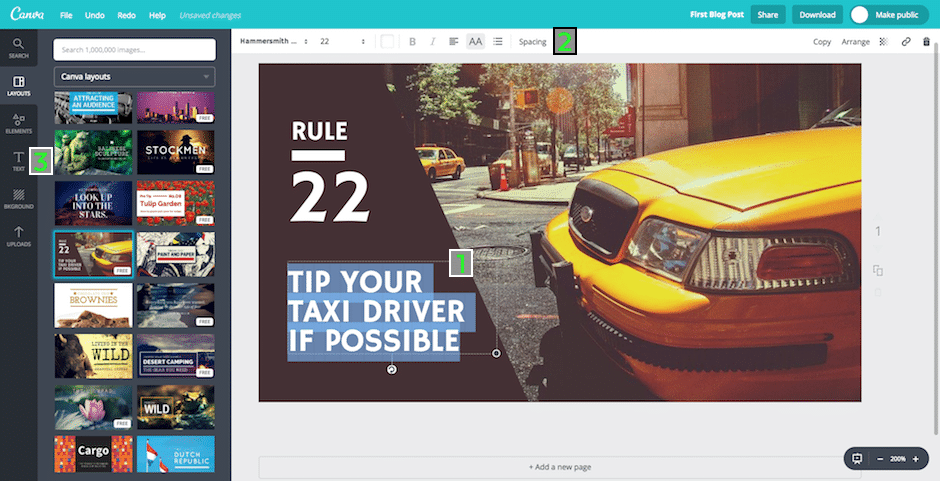
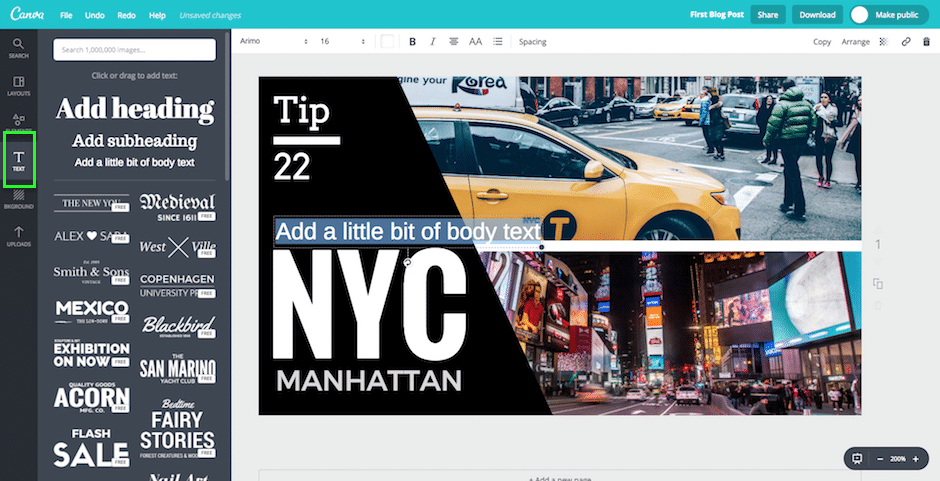
If you have selected a pre-made layout, you can still add your own text or background images if desired. To insert your own text, simply click over the pre-written text and re-write it (1). You can also adjust the size, color, and font using the toolbox at the top (2). Or you can insert your own text wherever you'd like by selecting "Text" on the left (3)
Step 5: Set Your Background
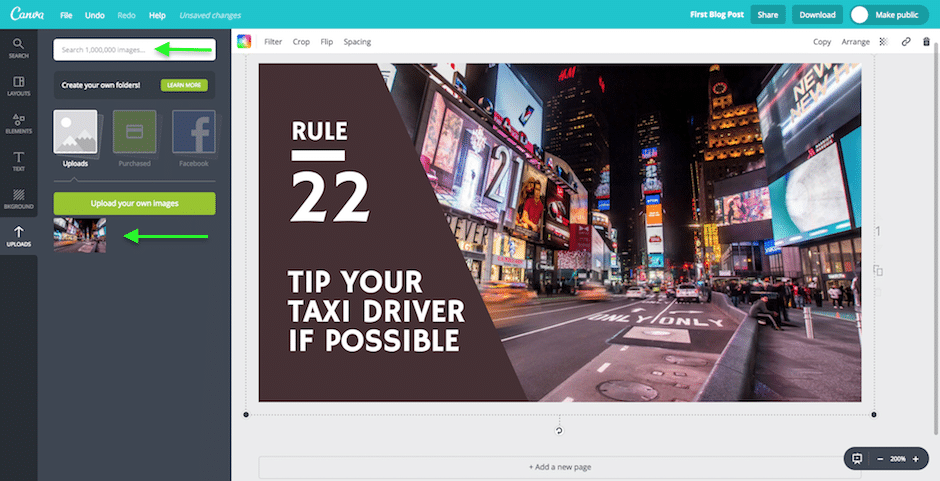
Use an Image: If you want to add your own background image, click the UPLOADS button on the sidebar. From here, you can upload images from your desktop. You can also use sites like StockSnap.io or Unsplash to find a diverse range of high-resolution stock images. Canva also provides a variety of free images that you can access in their ELEMENTS section.
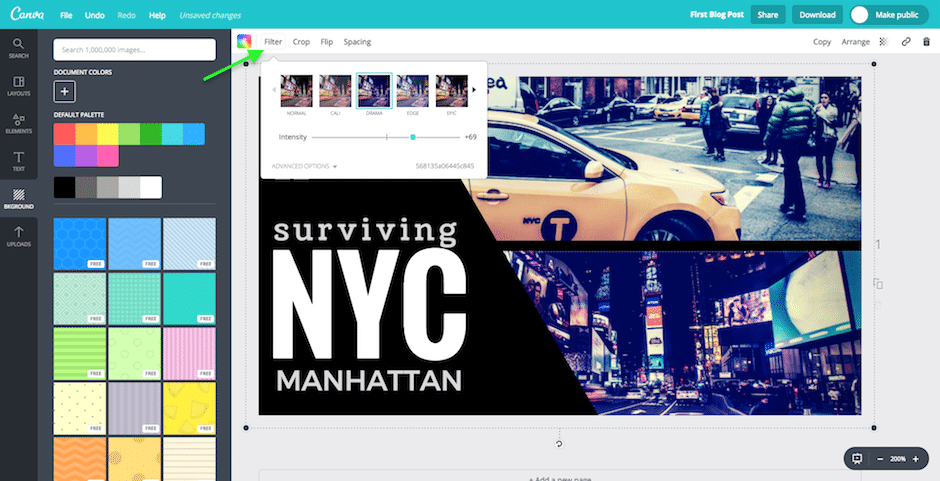
Make adjustments to your photos. Click on the FILTER button in the toolbox to adjust things like brightness, intensity, contrast, and saturation.
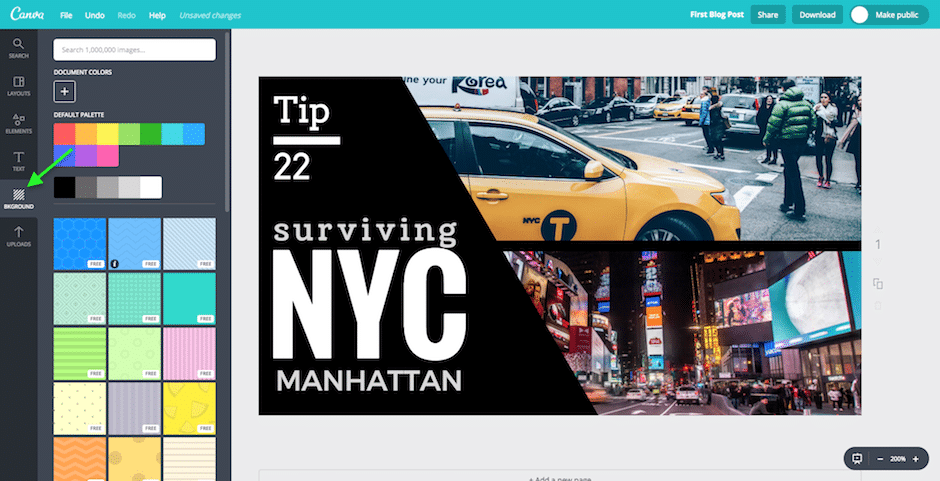
Or Use a Color: If you would like a non-image background for your header, click the BACKGROUND tab. You can either select a solid color for your background or choose from one of Canva’s own backgrounds.
TIP: Use Design Elements
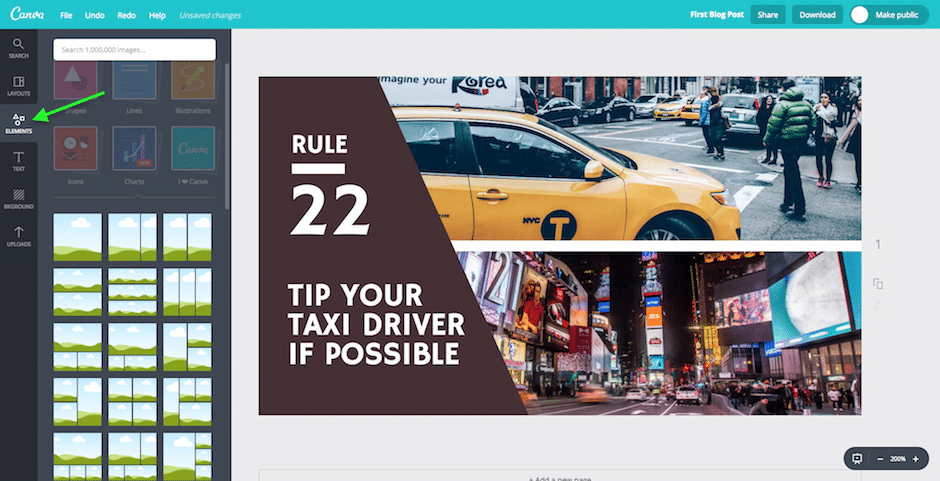
The ELEMENTS section also lets you add shapes, lines, grids, icons, or frames to your header. Grids are a great option if you want to add multiple images to your header. Simply select which format of grid you’d like to use and then drag your desired image inside the grid. Keep your design simple, without too many distracting elements. You want your header to be clean and bold, not over-crowded and busy.
Step 6: Add Text for Your Headline
The TEXT tab allows you to add Headings, Subheadings, and small bits of text to your header. Click “Add Heading” and a field of text will appear over the header you have created thus far. Click on the text and you will be able to write whatever you want as well as change its font, color, size, and spacing using the toolbox. You can also scroll down and select one of Canva’s pre-made text designs and then edit from there.
Step 7: Make Adjustments
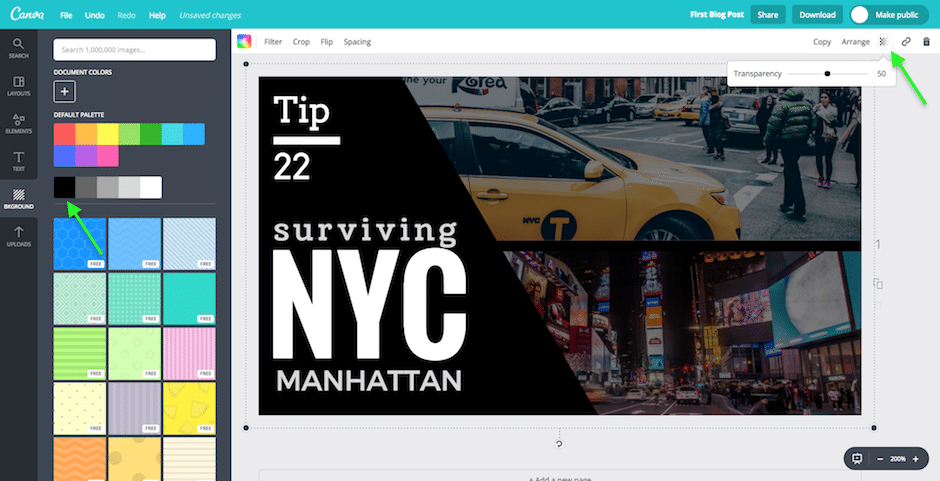
You might also need to adjust the transparency of your background image if you are having trouble seeing the text you have added to your header. One of our favorite tricks for making text more legible is to add a dark black or grey background underneath your chosen image then adjust the transparency of this image. By doing this, your text will stand out more against the background and be more visible to readers.
Step 8: Download the Design
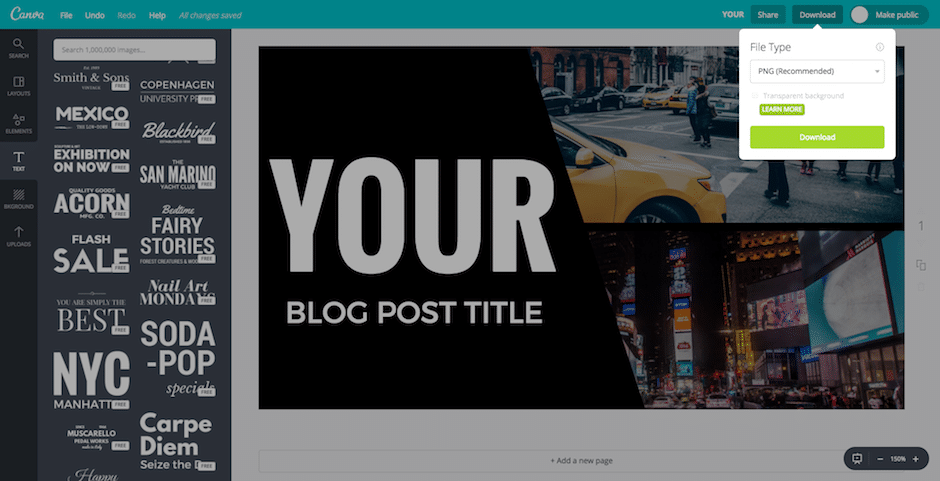
Once you have done all of this, you will have a snazzy header that you can now download to your desktop. On the turquoise bar at the top of the page, click the DOWNLOAD button. Select PNG as the file type and then click Download.
Step 9: Upload to Your Blogging Platform and Add to Your Post
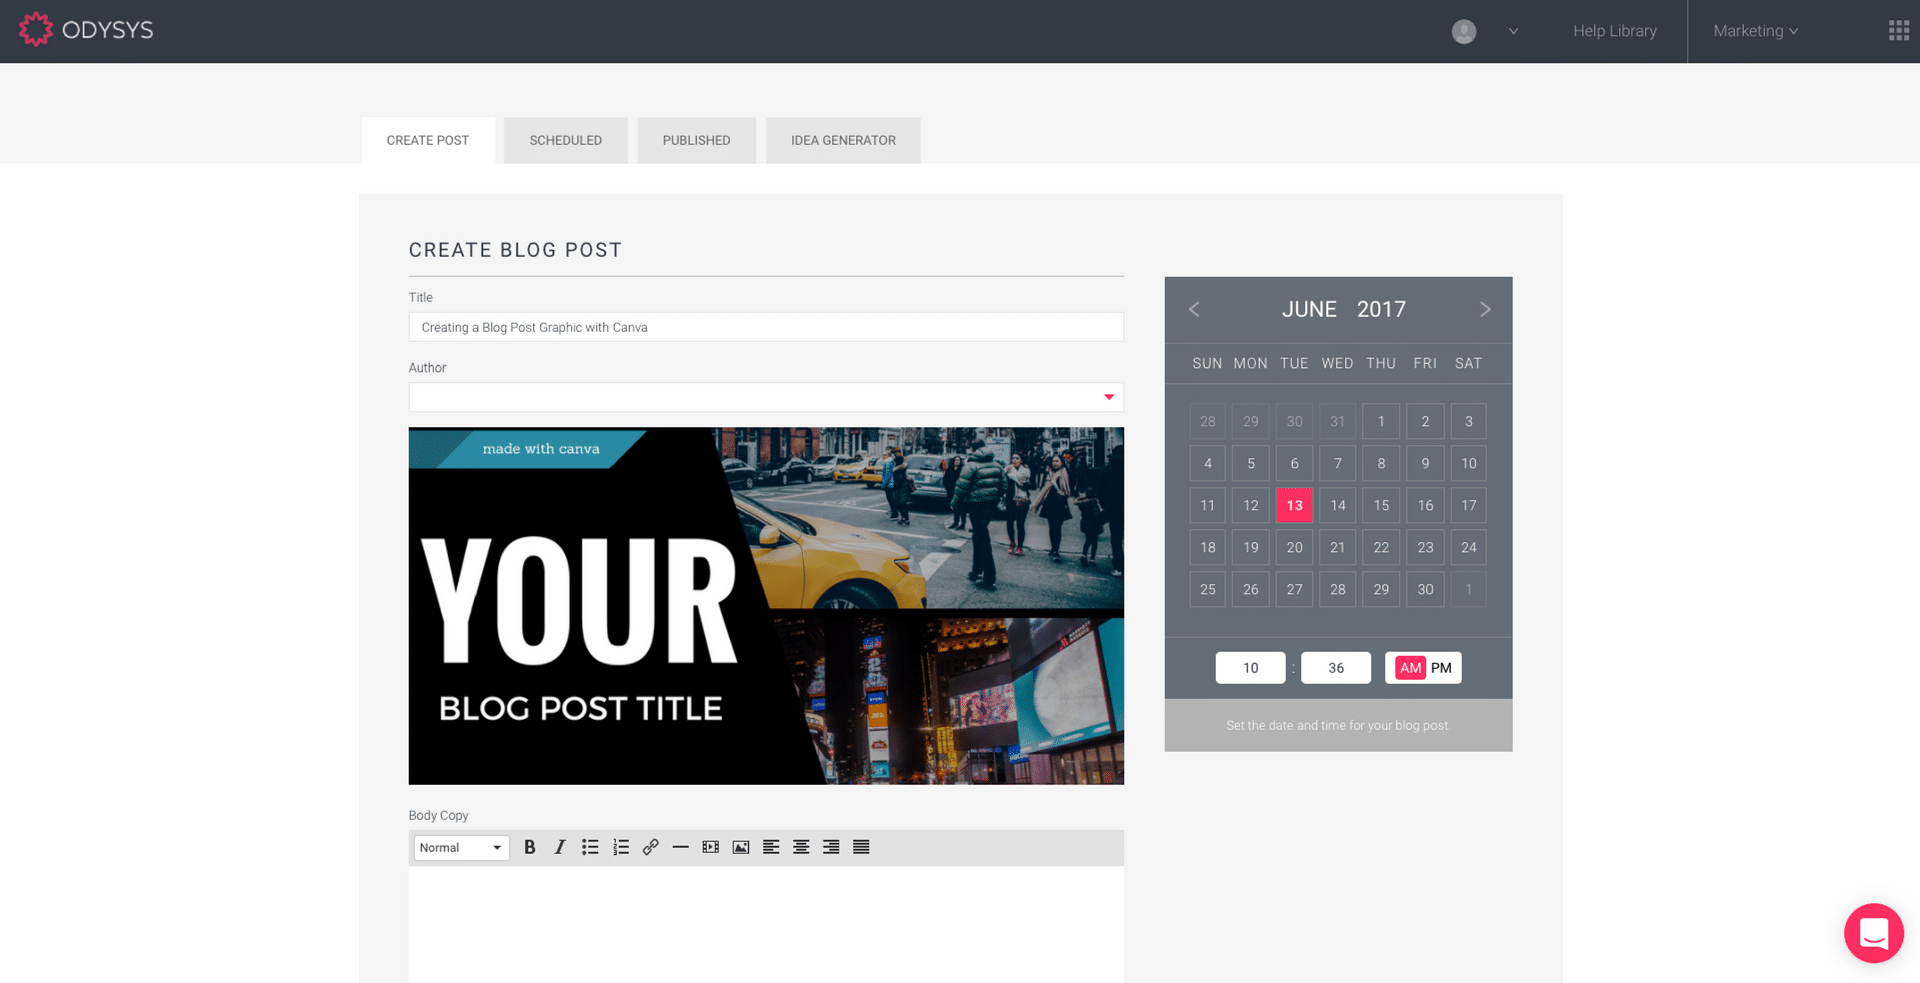
From here, all you have to do is upload your new header to your blog post.
Tip: Remember that the ideal size for header graphics on the Odysys blog is 800x450. This will ensure that your image is bright, crisp, and legible for all visitors.
Happy Designing!
Having a beautiful, thoughtfully designed graphic header is an essential step in grabbing a reader's attention and drawing them to the actual text of your blog post. Whether you use many of Canva’s pre-made designs or work from scratch to create something totally original, learning the basics of Canva will help elevate your blog, as well as any other social media platform you may use, to a whole new level.

